
How to Do Handstand? 30 Days Comprehensive Roadmap for a Complete Handstand
Table of Contents
What Is A Handstand?
A handstand is way more than a neat party trick. Not only does it work upper-body and core strength, but it also trains balance, body awareness, deep breathing, focus, and discipline—skills that are transferable to every mountain sport and outdoor activity, as well as daily life.
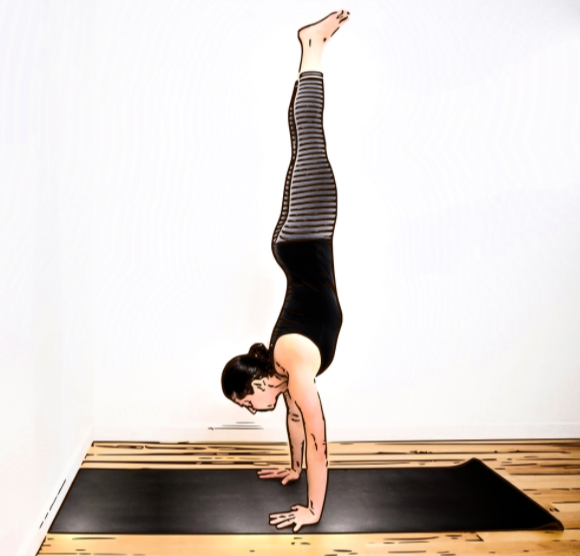
You have to be in control of your body as well as you have to be aware of the body balance on your hands. All the time you can’t be thinking about anything else. Handstand pose grounds your breath, helps you clear your mind, and provides you a new way of looking at things upside down.
Why We Practice Handstand?
Some try handstand as a form of stamina and inner balance, some do it as handstand yoga, and some tries to be fit and flexible.
The thing which matters here is how you adapt the exercise with your fitness regime. Like the way we stand in our leg, it’s just upside down. Here legs will be in upside and your head will be on the downside.
For flexible people, it is easy because athletics or those who involve with sports activity it becomes easier but for a normal adult who is not associated with sports and fitness it will be a bit hefty and challenging.
Do Handstands Build Stamina Or Muscle?
Handstand does it all. It’s an immense fitness test to handle with your built of physique. With regular practice of handstand, one can achieve many things.
- First, you can think of the core balance of the body.
- Second, you can increase your muscle stamina for the whole hand.
- Third, your wrist will be at least five times more powerful than it was before.
- Fourth you can bring your metabolism rate in perfect harmony with blood pressure.
- Fifth you can bring a long-lasting youth fullness in your life and many more…
How Often Should You Perform Handstands?
Every morning (or at least 5 days a week), do three handstands against a wall for as long as you can. Rest 10-20 seconds in between sets. Bring attention to the entire time. Target for a total of at least 90 seconds.
If your arms start shaking, it’s absolutely normal. Nothing to worry about. It’s a sign you’re building up your strength. Practicing handstand is always a matter of a good amount of regular practice. If you are serious about giving it a shape worm up till post-exercise everything is super important.
What Is Harder Handstand Or Headstand?
In a way, both of’ ’em are quite tough. But gradual practice brings it easy for a flexible body. Most of us used to believe that headstand is easier than a handstand. To some extent yes it is, why because you are covering more amount of surface with your body.
Wherein handstand it’s your wrist, biceps, triceps, delts, and body core muscles. But one thing that is good about handstand is that while in Handstand you can come out from the posture very quickly.
Handstand Progression Warm-Up Routine
First, you must be injury-free and healthy. Handstands place stress on the wrists and shoulders and require adequate mobility in the lower back and hamstrings.

If you have any pain in these areas, hold off until you’re back in action. A good warm-up is essential to injury prevention.
Begin with a yoga session or your favorite moves to loosen up and open your shoulders and activate your arm, core, and back muscles.
Handstand Progression – Preparatory Posture
Preparatory exercises for handstand are used to help build the necessary strength and confidence to finally add the move to your collection. Handstands come down to panic and anxiety for most people, but with preparatory exercises, one can achieve performing handstand within a month.
First step is to get comfortable being upside down on your arms, then you can progress to balancing on your hands and sooner or later perfect your form.
As you work toward the real deal, start with the first three moves of this exercise progression, and continue until you find them easy and comfortable before moving on to practicing a handstand pose with a wall. Move at your own pace, and remember, consistent practice is key.
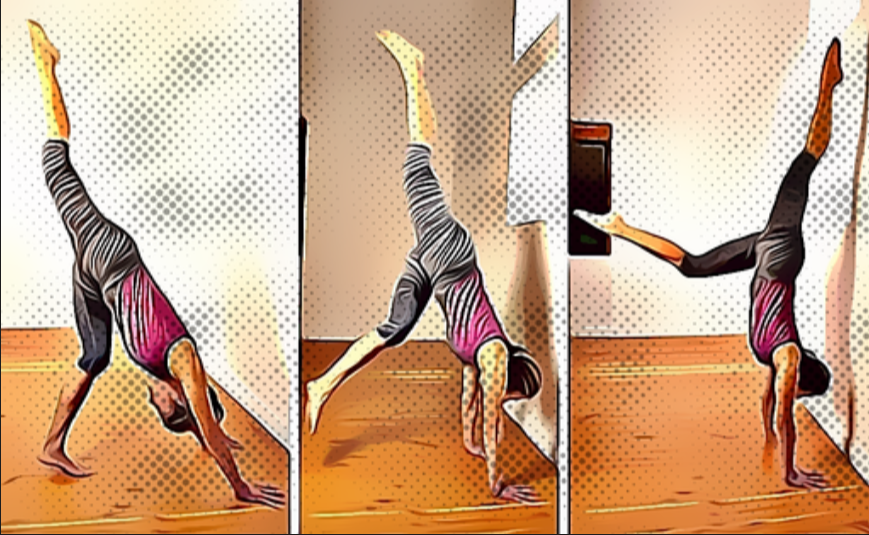
“L” Handstand at Wall
Steps to do “L” Handstand at Wall

- Initially stand to a wall. Bending forward at the waist, position your hands on the floor in front of you exactly shoulder-width apart.
- Your hands should be a leg length away from the wall. To decide the correct distance from the wall, sit on the ground facing it with straight legs, inch forward until your feet touch the wall.
- Put your hands at your hips to mark the distance. This is where your hands should eventually be placed. Now comes the real deal.
- Spread your fingers and press your palms flat on the ground. Walk your feet up the wall until your legs are parallel to the floor—this will center your hips over your body.
- Hold the position for 20 seconds to a minute or as long as you can maintain good form.
Benefits of “L” Handstand at Wall –
- Builds arm and core strength of wrist muscle.
- Helps you get comfortable upside down on your arms.
- Those who are not good at aligning body parts, raise your spirits for a proper hand, wrist, elbow, and shoulder alignment.
How Much To Practice
Try to practice five to seven repetitions at once. If you cannot hold the position for 30 seconds at a time, break it down into shorter durations, such as three ten-second holds with a short rest between each until you build up the durability.
Wall Kick-Ups
Essential functionalities
When you don’t want to fell on the opposite side or have a risk of losing the balance then wall kick-ups are best for maintaining balance.
How to do Wall Kick-Ups
- From a standing forward bend, place your palms flat on the ground, shoulder-width apart, roughly six or more inches away from a wall.
- Raise one leg in the air, then step with the other to lift off your feet straight overhead.
- Lightly tap the wall with your heel, then return your feet to the ground for one repetition. Repeat, and switch the hopping leg every set.
How much to practice Wall Kick-Ups
Initially try three to four sets of ten reps
Benefits of Wall Kick-Ups
It increases arm and core strength as you regularly practice.
It’s risk-free while you have a chance of flipping over backward.
Crow Pose
Essential functionalities
Trains balance on your hands while continuing to improve body awareness and arm and core strength.
How to Perform Crow Pose
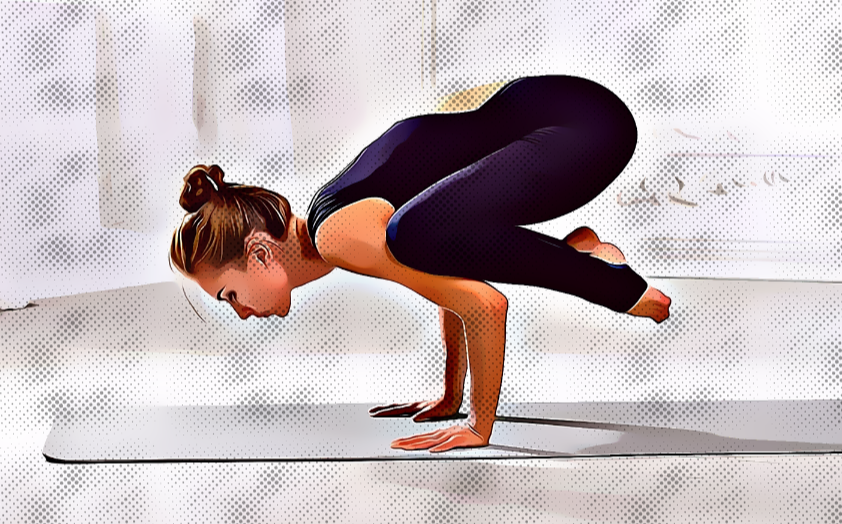
- Squat with your feet a few inches apart and your palms pressed flat on the floor, directly below your shoulders.
- Place your knees a little bit wider than your hips, and ride them with your upper arms upside as possible.
- Stand up on your toes, and lean forward to place the weight of your body on your upper arms (through your knees). Lean forward until your feet leave the ground.
- Keep your balance, and hold for at least 20 seconds to a minute or as long as you can. Slowly come back to the normal position.
How Much To Perform Crow Pose
Each time with a trial try practicing at least 3 to 4 times. Depends on your physique you can increase
Handstand Progression – Post Exercise Schedule
Few exercises are always great for improving your abs, shoulder, and upper back strength.
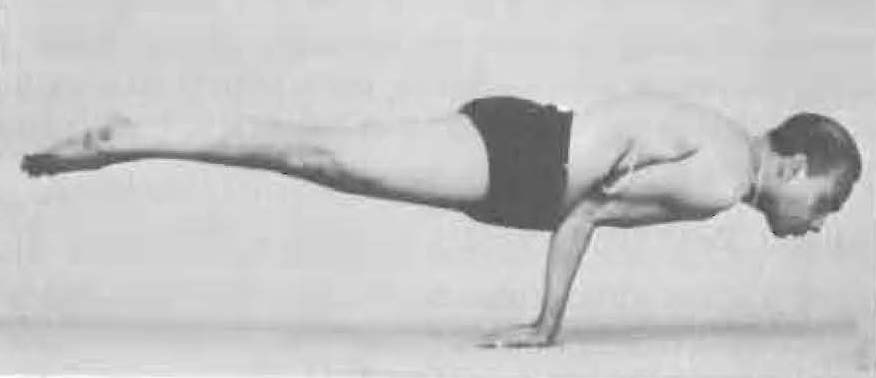
Mayurasana
Essential functionalities
It is effective therapy for diabetes and piles. Mayurasana makes it stronger and energizes many organs, including the stomach, intestines, spleen, liver, pancreas, and kidneys.
How to do Mayurasana
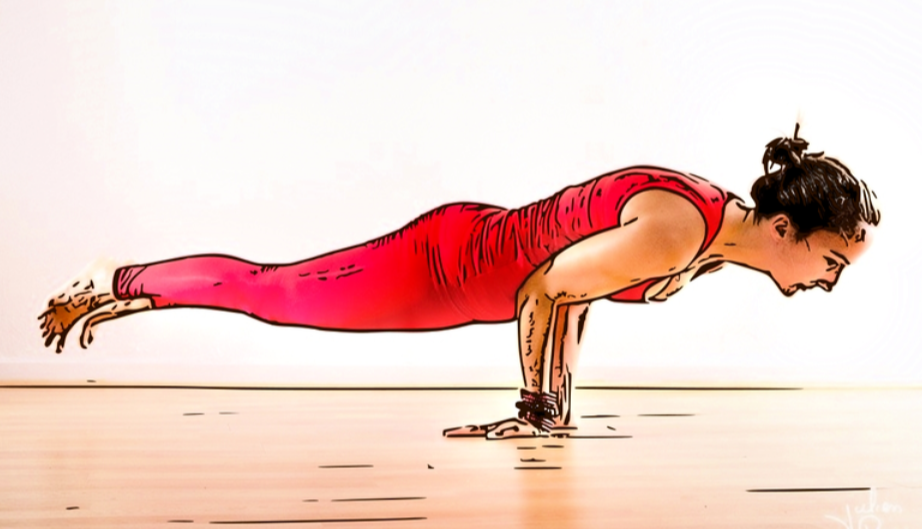
- Maintain your body on a flat surface with your knees curved.
- Place your heels close to each other and make sure that your knees are wide apart.
- Now, kneel forward, place your palms on the ground between your knees with your fingers pointing towards your body.
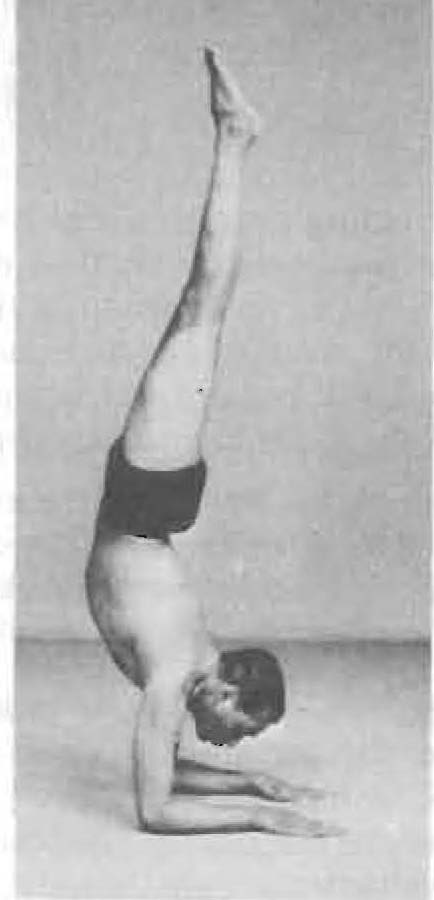
Handstand with Wall
Essential functionalities
Allows you to practice a handstand without the fear of flipping over backward.
How to Handstand with Wall
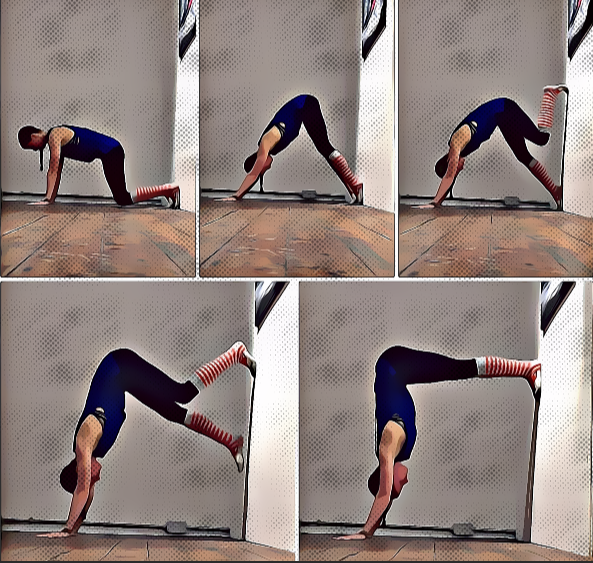
- Have you ever tried to kick in the backward direction? Well, you’ll do that but in an upside way. Go for standing forward bend, place your palms on the ground and one to two feet away from a wall.
- Check to ensure your arms form a straight line. Lift one leg in the air, then jump with the other to push your legs above your head.
- Try not to touch the wall. Find your center body balance, and hold there for as long as you can.
- In case anytime your leg or hand starts shaking or you assume to fall backward. Slowly bring one of your legs and use the wall for support.
My Experience While Practicing Handstand for 4 Weeks
Handstands construct up your core strength. Your hand muscle require you to stabilize to keep from falling over. The only suggestion I can give is how much strength you have. First, build a good hand muscle which can at least take your weight then make your body fit.
I was initially nervous without knowing how to hold a handstand for more than 2 seconds. When I
Went to my gym it was a requirement to hold for a minute and that was tough. I learned how to hold a minute after a month and a half. So I’m going to share with you what I did for me.

First Week
Initially, I started practicing with wall kick-ups and L handstand with wall. These two I kept on doing.
For 5 to 6 reps for at least 10 seconds each time. Sometimes I tried to come straight with hand but quickly lost balance.
Second Week
Next week I focused on maintaining balance and started working on increasing stamina on my hands by practicing pushups and dips.
Started working on the handstand with the wall so that I can stay for a bit longer time. In the meantime, I felled down two times while my coach holds me once.
Third Week
In this week I had almost brought myself in handstand but not able to maintain balance. This becomes a big issue. I started performing crane or crow pose. This pose helped me a lot.
Fourth Week
I was making variations this week and taking time for increasing the timing for body balance. I was okay with hand muscle.
Depending on how much strength you have it decides how much time it will take for you to stand a minute or more than one minute. Being strong is one fact but the most interesting fact is the balance.
If you have proper balance and rhythm in the body, it might take one or two weeks but for a novice, it might take more than three weeks.
Benefits of Practicing Handstand
For standing in hand for approx. a minute or more than that requires practice.
Benefits:
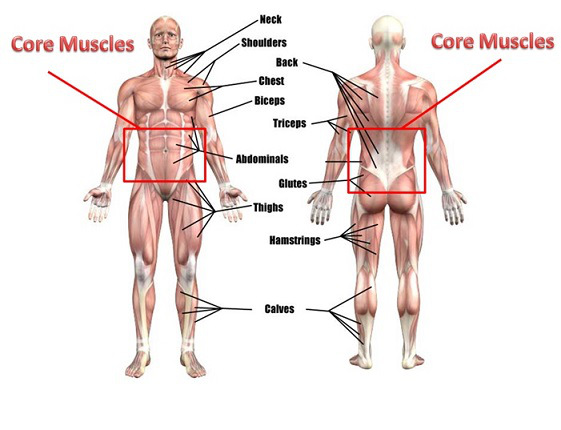
Handstands not only work you’re the abs muscle, but they also make a solid foundation for hip muscles, hamstring, and inner thigh muscle. Our spinal nerves get balanced, it builds a super-strong core. It has few interesting benefits such as:
- 1. It increases blood circulation in the upper body naturally.
- 2. Increasing the blood flow makes betterment in the lungs. Handstand is plyometric exercise (meaning own bodyweight bearing)
- 3. It strengthens your nerves and muscle in your spine, shoulders, arms, abdomen, and wrists.
- 4. If practice handstands every day it will get you a well-balanced having a super-strong core.
- 5. They help with overall bone health, circulation, and breathing.
Tips for Mastering Handstand
I can share few personal tips for mastering handstand. I had gathered them while I performed a handstand on my own.
Tips 1. Attest 10 min for hand exercise like normal pity exercise for hand. It brings flexible hand
Tips 2. At least 10 min back and chest exercise. This gives you an idea so that you are ready to take the balance and pressure.
Tips 3. Do 10 minutes of leg exercise like squat for 5 minute s and leg stretch for 5 minutes.
Then start performing handstand.
4 Ridiculously Simple Tricks for Doing Handstands
The most simple trick is the timing and place.
The first trick is you must practice in the morning because your body muscle is fresh in the morning. Preserve your abs tight and push through your shoulders.
The second trick is to ask your partner, friend to be with your side while asking them to hold your leg maintain it straight. Hold onto your legs tight.
The third simple trick is you must practice in a soft place like in the grassy ground, a lawn, etc. Even if you fell here you will not be hurt.
The fourth and most important trick is to squeeze your butt. When you go into a handstand, you should be squeezing your butt the entire time, starting with the kick up.
How Long Does It Take To Learn Handstands?
This is a bit tough to answer because I have seen people initially start the preparatory exercises systematically. After few days most of them are not regular and practicing but not enough focused. Because of this, they lose the streak after falling once or twice. Then the progress is very slow.
The key is regularity. If you are focused then it’s gonna take a minimum of three weeks to master the handstand or even doing it effortlessly. After two weeks your mental change will also occur as you start seeing things upside down.
Should You Do Handstands Everyday?
Hell Ya…Meanwhile when you bring yourself against gravity your body core forces you to alleviate your muscles. It is something as you’re repetitively working your abs, as well as other key muscle groups such as your hip flexors, hamstrings, inner thigh muscles, obliques, and lower back.
Working out handstands every day will bring a super-strong core as well balanced.
Are Handstands Bad For You?
It is a fact that while performing yoga and headstand posture it might bring intraocular pressure in the eye muscle, which is a matter of risk for glaucoma patients.
Based on individuals bodies while performing a handstand will double the eye pressure for most of us. Even people with normal eyes or even young and healthy people.
Sometimes it a matter of concern for the people who have a problem with the wrist or shoulder. Because of the shoulder or wrist is having some previous injury then it is better not to perform.
Conclusion

First, make your shoulder and arm fit then you can got for handstand. If there is a mismatch in the balance it breaks neck bone also. So to remain safer it is best to practice with chest-to-wall posture and remain safe.
If it takes a little longer than anticipated, don’t give up. When you’re practicing, it’s easy to get frustrated, but just remember, your body has been in the other direction your whole life. Take a breath, give yourself time to learn this completely new skill, and approach it with cheerfulness.
Reference
https://pubmed.ncbi.nlm.nih.gov/30220715/
https://pubmed.ncbi.nlm.nih.gov/11445766/
https://pubmed.ncbi.nlm.nih.gov/29471194/
https://pubmed.ncbi.nlm.nih.gov/31197281/
https://pubmed.ncbi.nlm.nih.gov/18986720/
https://pubmed.ncbi.nlm.nih.gov/28700510/
https://pubmed.ncbi.nlm.nih.gov/8809718/
Amazing… love to listen about so many interesting facts